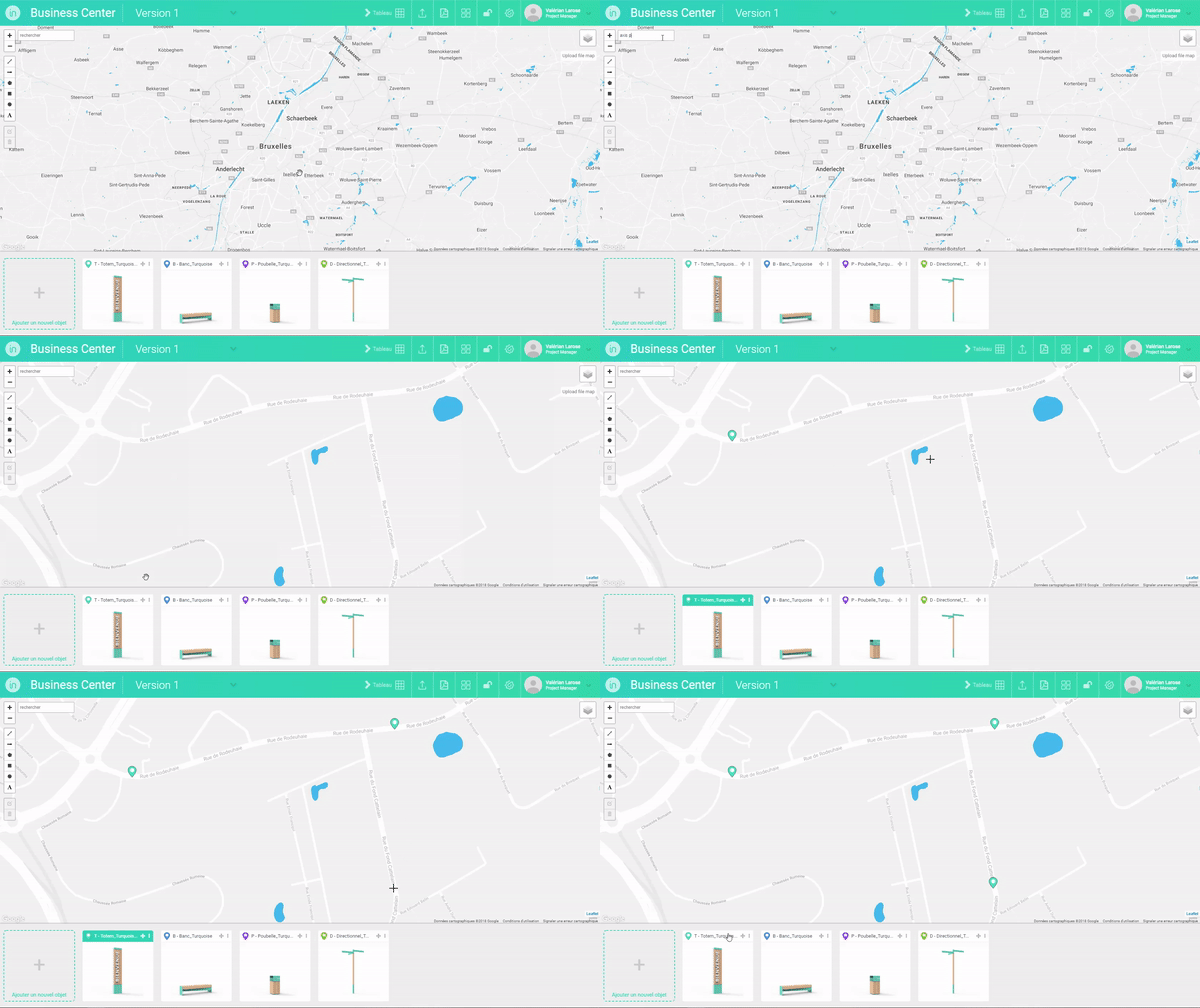
- On the search bar in the upper left corner of the map, find the location where you want to place your objects and click on the appropriate result so that the map is centered on the desired location.
- In the object collection area below the map, click on the title bar of the object to be placed, which contains the object reference and name.
- The background of the title bar turns green, and the mouse cursor turns into a cross when hovering over the plan, confirming that you have entered the “implantation” mode.
- Click on the point(s) on the map where you want to place the selected object to create implantation markers of the object.

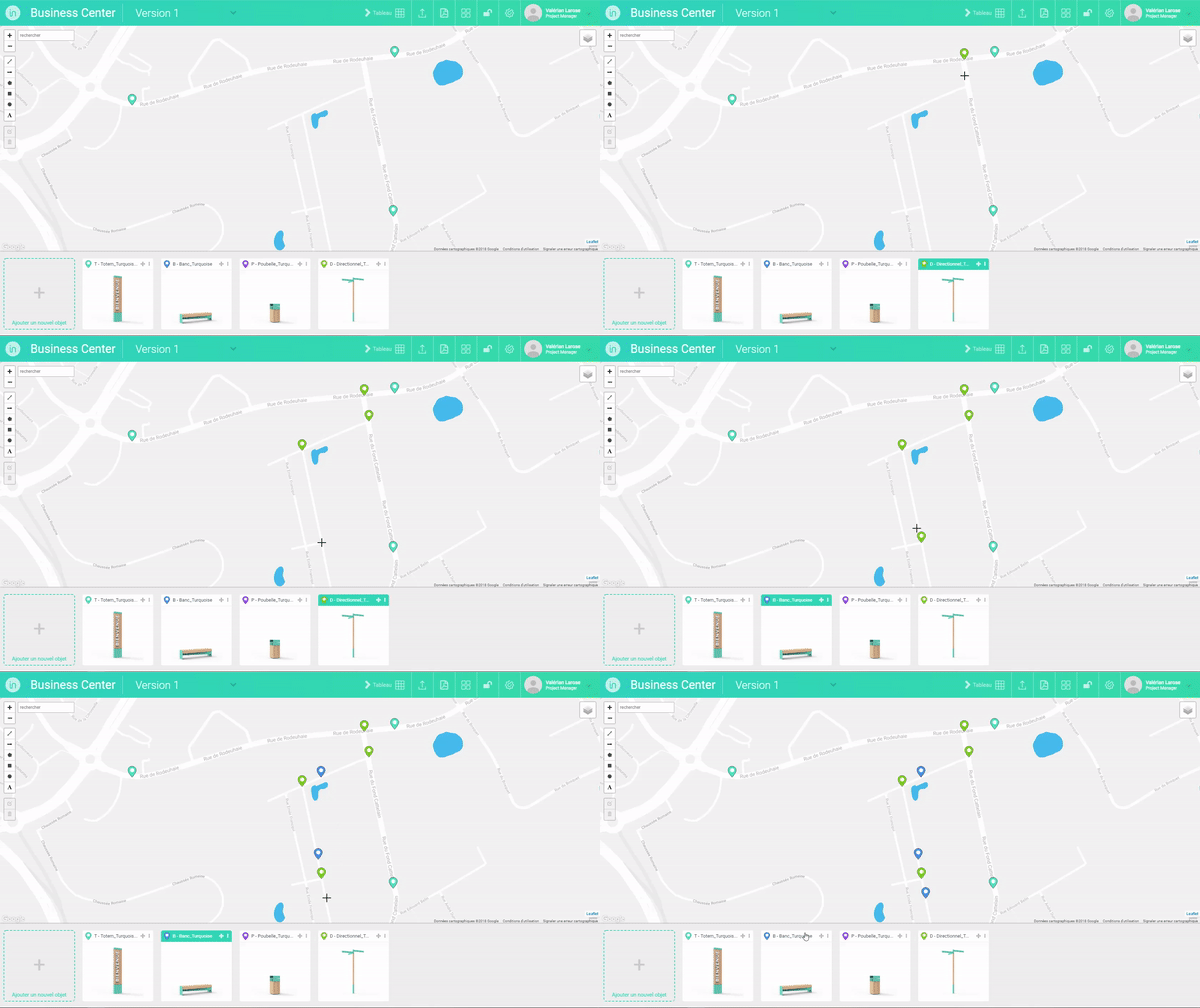
- To implant another object, click on the title bar of the object you want to implant in the object collection area below the plan.
- The background of the title bar of the selected object turns green.
- Click on the point(s) on the map where you want to place the selected object to create implantation markers of the object.
- Repeat the operation for all the objects to be placed on the map.
- To exit the “implantation” mode, click again on the title bar of the selected object so that it becomes white again.

