In this FAQ, we show you how to manually assign a geolocation to a photo if, for example, you forgot to activate it on your smartphone or if you simply took your different pictures with a camera that does not have this feature.
There are various programs that will allow you to do this. We present you 3 of them (free) that we are currently using.
1) Geotag for Mac and Windows
Geotag by Inseetu is a free online tool (limited to 10 photo uploads in its free version) available on both Windows and Mac. It is very fast and easy to use. We invite you to learn how the tool works through this short video.
The process is straightforward and user-friendly. Here’s how it works:
1. Upload your photos
Start by uploading your images directly into the application. You can upload multiple photos at once for batch processing.
2. Place your photos on a map
For each photo, a pointer will appear on an interactive map. You can drag this pointer to indicate exactly where the photo was taken, allowing you to precisely geolocate each image based on the actual location.
3. Download your geotagged photos
Once all your photos are placed on the map, you can download a ZIP file containing your images. These photos will now include GPS coordinates embedded in their EXIF data, meaning each image will have latitude and longitude information attached.
This tool is ideal for professionals or hobbyists looking to maintain an accurate record of where their photos were taken, whether for personal projects, documentation, or archiving purposes.
2) GeoImgr for Mac and Windows
GeoImgr is a free online tool (limited to 5 photo uploads per day) accessible on both Windows and Mac. It is very fast and easy to use. We invite you to discover how the tool works with the help of a short video made by GeoImgr.
3) GeoSetter for Windows
GeoSetter is a free tool for Windows (requires Internet Explorer 10 or higher) designed to display and edit geographic data and other metadata (IPTC/XMP/Exif) in image files.
First, download and install GeoSetter.
Then open the program and search on your computer (using the drop-down menu at the top left of the screen) for the photo to be geotagged. Once you have found it, click on it to choose it. Its various known characteristics will then be displayed in the centre of your screen.
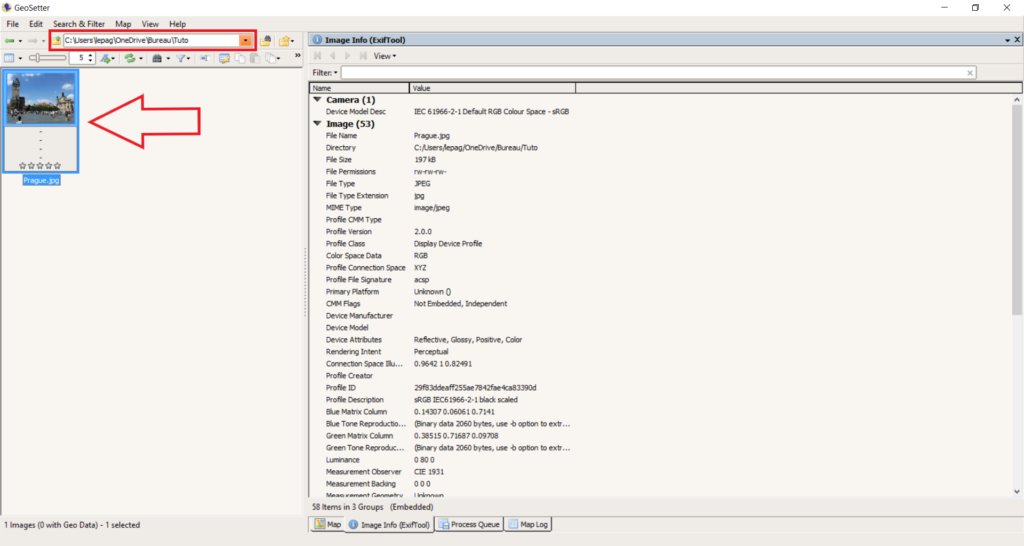
At the bottom of the window, click on the “Map” to display it. You can enter the address, city and other information (where the photo was taken) directly in the search bar or simply manually place the marker on the map by clicking on it.
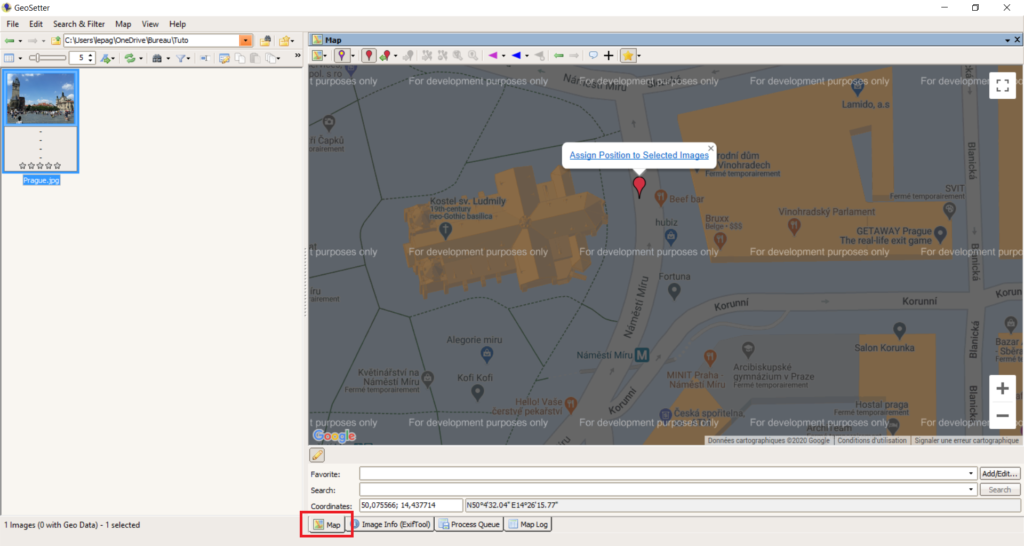
A marker appears on the map, as well as coordinates at the bottom of the window. If these are convenient for you, you can assign them to the photo by clicking on the icon you can see in the image below.
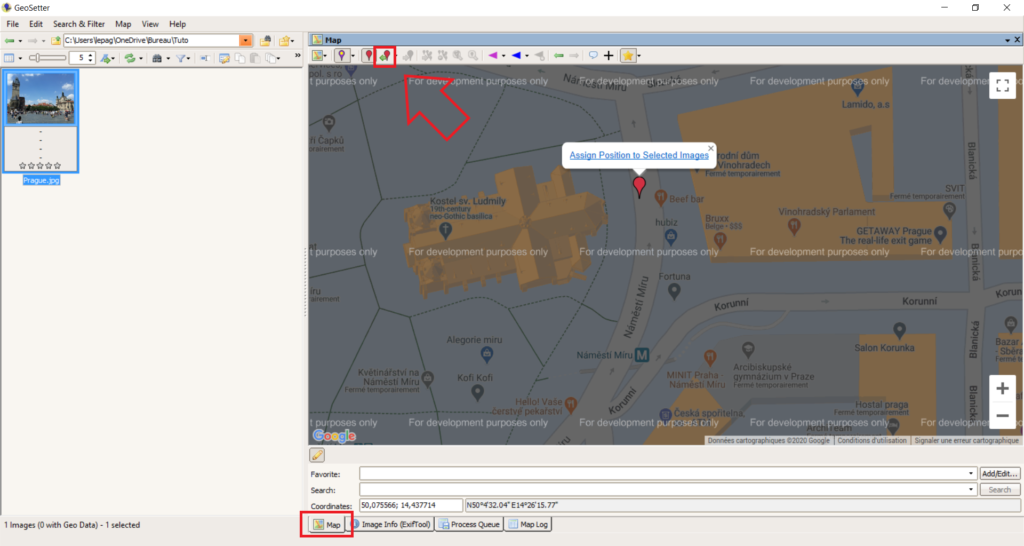
Your photo is now geolocalized! Save the new features of your photo by clicking on “Save Changes”.
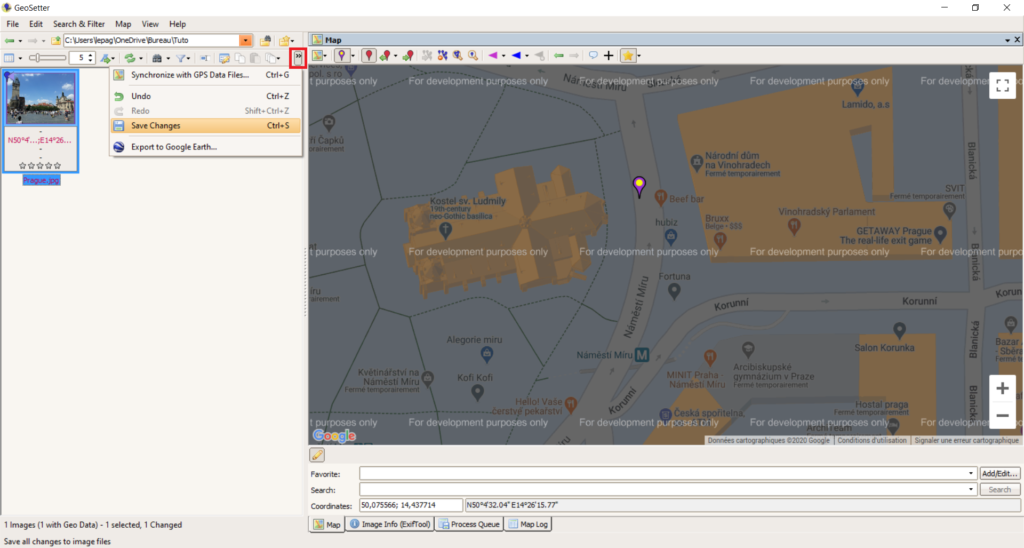
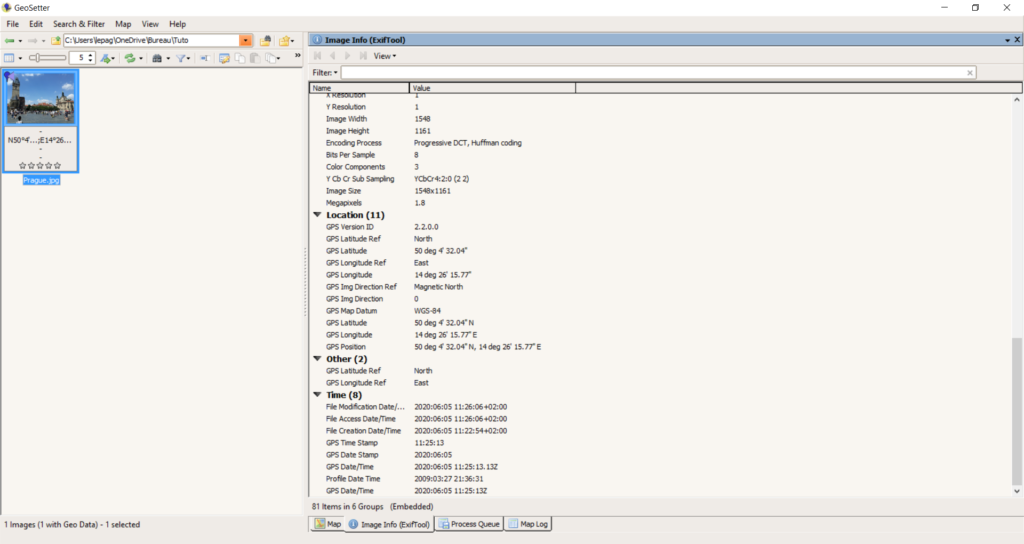
To verify that the photo is geotagged, click on “Image Info (ExifTool)” at the bottom of the window. If you scroll through the given information, you will find “location data”, including GPS position, latitude, longitude, …
