
UNDER ANDROID:
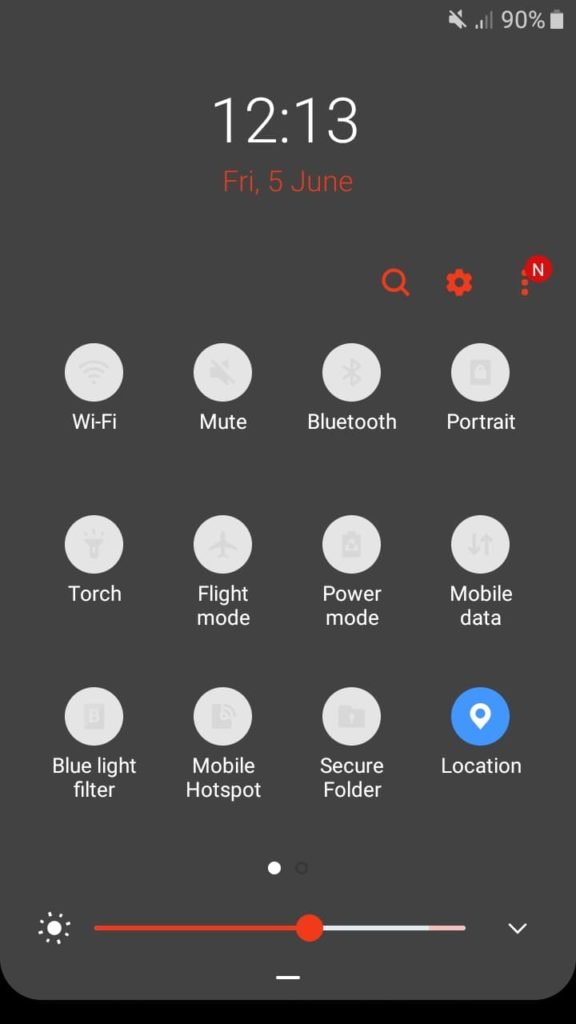
Start by activating the location in the drop-down menu of your smartphone.
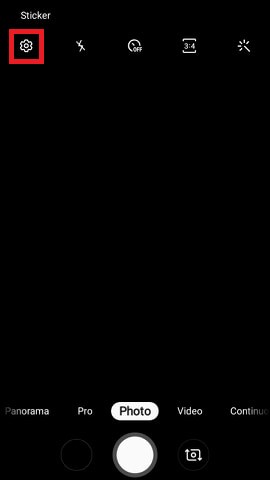
Open your photo application and access the settings.
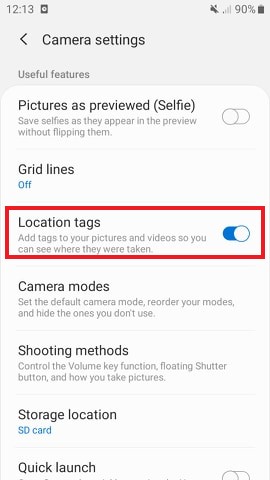
Scroll through the settings until you find the “Location tags” option. Enable it, which will allow you to assign a geolocation to your photos taken in the field.
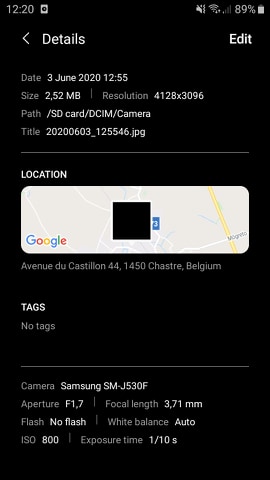
If you want to check that your photos are indeed geolocated, just go to your gallery and click on the desired photo. At the top right, open the parameters (represented by the three dots) and then click on “Details”. Various information will appear such as the title, date, resolution of the photo, but also the place where it was taken (if geotagging was activated beforehand).
Once your geotagged photos have been created, all you have to do is upload them to your project in Inseetu and they will automatically be placed on the chosen background map.
UNDER IOS:
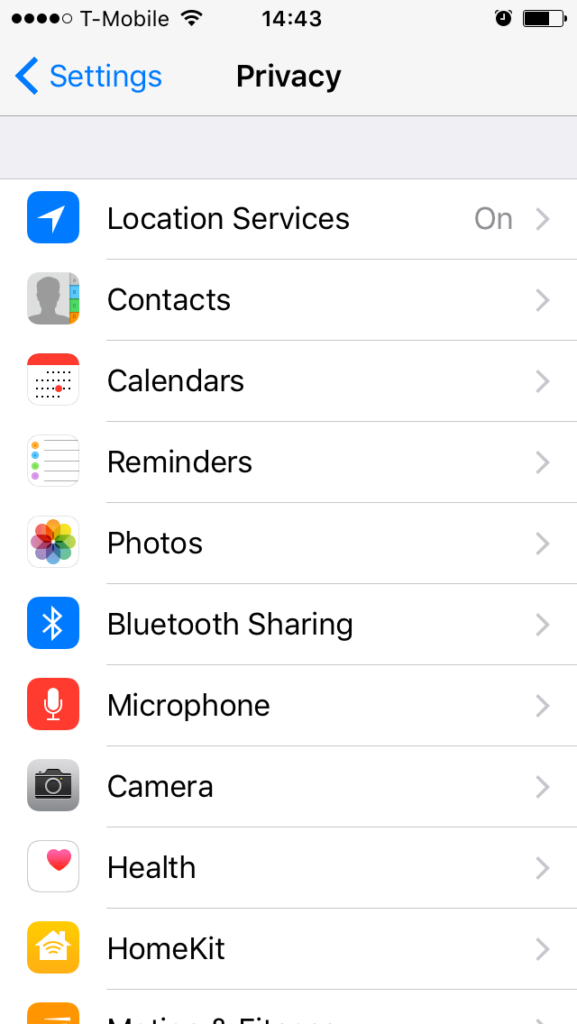
Access your device settings and click on “Privacy”.
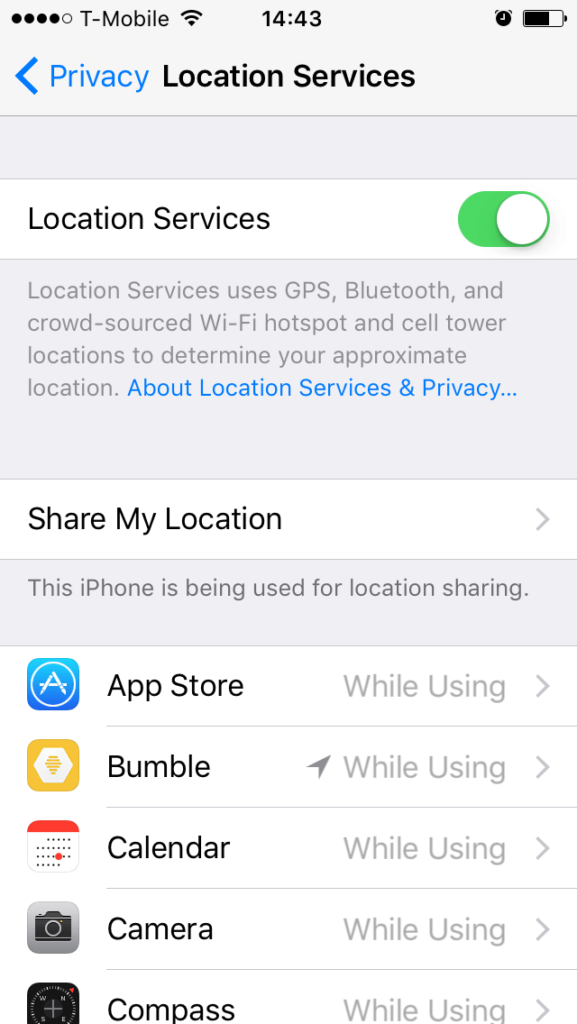
Activate the Location Services at the top of the screen and check that the camera is also activated. If it is not, click on the “Camera” line and check “While Using the App”.
To check that your photos taken are geotagged, go to your photo gallery. Click on the “Photos” button at the bottom of the window. Then select the collection of images whose location you wish to see by clicking on the text (address/city) just above. A map will then be displayed with the exact location where the photos were taken.
Once your geotagged photos have been taken, simply upload them to your project in Inseetu and they will automatically be placed on the chosen background map.